ZoneMinder is the most comprehensive Linux video camera security and surveillance system. It runs on any Linux distribution supporting Video4Linux (V4L or V4L2). Supports video, USB and network cameras.
In this document I will cover how to install and setup ZM on Ubuntu 16.04 LTS (Xenial Xerus) and derivatives. Let’s begin.
Installing ZoneMinder
ZM requires installed and properly functioning LAMP (Linux, Apache, MySQL/MariaDB & PHP) server. If you haven’t running LAMP server I encourage you to read how to install LAMP on Ubuntu. And then go back here.
If you want newest version of ZM add ppa repository:
|
1 2 |
add-apt-repository ppa:iconnor/zoneminder apt-get update |
Of course you can skip this part and install ZM from default Ubuntu repository:
|
1 |
sudo apt-get install zoneminder |
Create the ZoneMinder database:
|
1 2 |
mysql -u root -p < /usr/share/zoneminder/db/zm_create.sql mysql -u root -p -e "grant select,insert,update,delete,create,alter,index,lock tables on zm.* to 'zmuser'@localhost identified by 'zmpass';" |
Change permissions:
|
1 2 3 |
sudo chmod 640 /etc/zm/zm.conf sudo chown root:www-data /etc/zm/zm.conf sudo chown -R www-data:www-data /usr/share/zoneminder/ |
Configure Apache2 server
|
1 2 3 |
sudo a2enconf zoneminder sudo a2enmod cgi sudo a2enmod rewrite |
Allow access to webcam for ZM
|
1 |
sudo usermod -a -G video www-data |
Enable and start ZM daemon:
|
1 2 |
sudo systemctl enable zoneminder sudo systemctl start zoneminder |
Set timezone in php.ini using your favorite editor
|
1 |
gksu gedit /etc/php/7.0/apache2/php.ini |
If you are living in Poland, you can simply paste below command instead of editing php.ini
|
1 |
sudo sed -i 's/;date.timezone =/date.timezone = Europe\/Warsaw/g' /etc/php/7.0/apache2/php.ini |
Finally, reload Apache2 server
|
1 |
sudo systemctl reload apache2 |
Setting up ZoneMinder
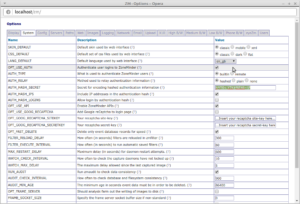
ZM uses web interface as its frontend allowing full control of system or cameras as well as live views and event replays. So now open ZM frontend by typing in your browser https://localhost/zm/. The first thing we have to do right after installing ZoneMinder is securing it. In order to do this go to: Options -> System. Enable OPT_USE_AUTH and type same random string in AUTH_HASH_SECRET. Other two imported settings AUTH_TYPE and AUTH_RELAY should be set fine by default. You can also change the LANG_DEFAULT to your native language.
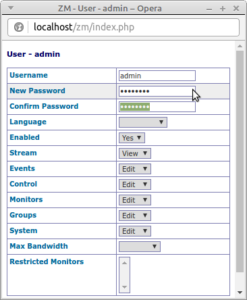
Save settings and refresh ZM frontend. You will see a login screen. Login with default login / password which are admin / admin and immediately change the password for admin user.
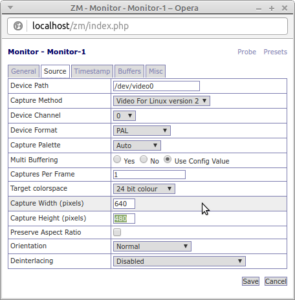
And now the best part. The key role in the program are so-called Monitors. To define Montor you must specify its name, mode of work and data source. The data source determines where the image is from. The data source may be a local video camera (both USB and attached a video card like TV tuner), or remote network video camera as well as the file containing the image.
In my case I only have to change capture resolution to make my webcam working.
The image of the camera can be saved as image files or movies. The save location may be the local computer well as remote FTP server. Very well organized is the method of review. It is possible to send a message to a specific recipient with notification about emerging alarms. When we have a rotary camera, ZM allows you to control this camera from the web interface.


