


Recently a friend of mine asked me for step-by-step guide for installing LAMP server. Since there is such a need, I decided to share this guide with a larger community.
LAMP
LAMP is an abbreviation of the first letters of Linux (operating system), Apache HTTP Server (web server), MySQL / MariaDB (database server) and PHP / Perl / Python (script language). The AMP software package works on other operating systems such as Microsoft Windows (and then it is called WAMP), Mac OS (MAMP), Solaris (SAMP) or OpenBSD (OAMP). Although the original authors of these programs have not designed them all to work with each other, the contemporary development philosophy and toolsets are common and have been developed in close collaboration. This software combination has become popular because it is free and opensource, so it’s easy to modify and because of the universality of the components of the package that come with every modern Linux distribution.
To the point. I will skip the installation of Linux itself 😉 and will go straight to installing the rest of LAMP server on Ubuntu 16.04 LTS Xenial Xerus. Of course, all commands are executed in the console / terminal.
Apache HTTP Server
To install Apache HTTP Server you need to issue one command only:
|
1 |
sudo apt-get install apache2 |
Your web server should be accessible in your browser, just type http://localhost/.

Apache2 Ubuntu Default Page
Apache2 looks for website in the default location /var/www/. By default this directory is writable by root user only. To host homepages of all other users you can enable userdir module. In this case regular user stores its homepage in ~/public_html/ directory and it is accessible on the web at http://localhost/~username/.
|
1 2 3 |
sudo a2enmod userdir sudo systemctl restart apache2 mkdir ~/public_html |
After making changes, you need to restart Apache server.
Self-signed SSL Certificate for Apache HTTP Server
Next thing to do is to create a self-signed SSL Certificate which will allow you to encrypt traffic to your server. Additionally, the certificate can show server’s identification information to site visitors.
|
1 2 3 4 |
sudo openssl req -new -x509 -days 1461 -key /etc/ssl/private/ssl-cert-snakeoil.key -out /etc/ssl/certs/ssl-cert-snakeoil.pem sudo a2enmod ssl sudo a2ensite default-ssl sudo systemctl restart apache2 |
The first command openssl will create a self-signed SSL Certificate. I will tall a bit about its parameters:
req– this specifies a subcommand for X.509 certificate signing request (CSR) management. X.509 is a public key infrastructure standard that SSL adheres to for its key and certificate managment. Since we are wanting to create a new X.509 certificate, this is what we want.-new– this option will create the certificate request.-x509– this option specifies that we want to make a self-signed certificate file instead of generating a certificate request.-days 1461– this specifies that the certificate we are creating will be valid for 3 years. Don’t create certificates valid only for one year, in my opinion this is to short.-key– this parameter names the input private key file already present in Ubuntu installation.-out– this option names the output file for the certificate that we are generating.
The command will be asked a number of questions. The most important and the only requested item is the line that reads Common Name (e.g. server FQDN or YOUR name). You should enter the domain name you want to associate with the certificate, or the server’s public IP address if you do not have a domain name.
|
1 2 3 4 5 6 7 8 9 10 11 12 13 14 |
You are about to be asked to enter information that will be incorporated into your certificate request. What you are about to enter is what is called a Distinguished Name or a DN. There are quite a few fields but you can leave some blank For some fields there will be a default value, If you enter '.', the field will be left blank. ----- Country Name (2 letter code) [AU]:PL State or Province Name (full name) [Some-State]:Masovian Locality Name (eg, city) []:Warsaw Organization Name (eg, company) [Internet Widgits Pty Ltd]:Corporation Organizational Unit Name (eg, section) []:IT Common Name (eg, YOUR name) []:domain.pl Email Address []:e-mail@domain.pl |
The second and third command will activate the SSL module and the SSL Virtual Host.

Apache2 SSL UserDir
PHP
PHP is the component of our setup that will process code to display dynamic content. It can run scripts, connect to our MariaDB / MySQL or PostgreSQL databases to get information, and hand the processed content over to our web server to display. Installing PHP is easy. Besides PHP itself we will install additional package, so that PHP code can run under the Apache server.
|
1 2 3 4 |
sudo apt-get install php libapache2-mod-php sudo nano /etc/apache2/mods-available/php7.0.conf sudo systemctl restart apache2 echo '<?php phpinfo(); ?>' > ~/public_html/phpinfo.php |
|
1 2 3 4 5 6 7 8 9 10 |
# Running PHP scripts in user directories is disabled by default # # To re-enable PHP in user directories comment the following lines # (from <IfModule ...> to </IfModule>.) Do NOT set it to On as it # prevents .htaccess files from disabling it. #<IfModule mod_userdir.c> # <Directory /home/*/public_html> # php_admin_flag engine Off # </Directory> #</IfModule> |
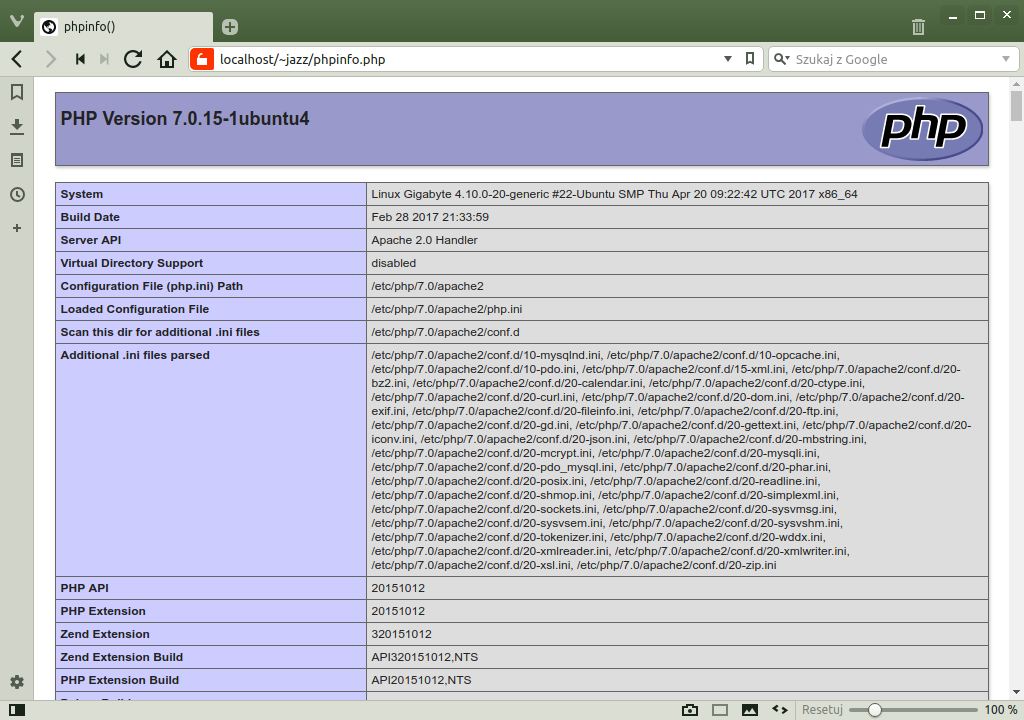
phpinfo
MariaDB and phpMyAdmin
It’s time to install MariaDB server. MariaDB is a database management system and it is a fork of MySQL. Installing MariaDB isn’t as easy as PHP, but we can handle it as well. The beginning is obvious:
|
1 |
sudo apt-get install mariadb-server |
By default MariaDB uses Unix Socket to login as root. Unix Socket enables logging in by matching uid of the process running the client with that of the user in the mysql.user table. In other words to access MariaDB as root you have to be logged in as root. In order to make phpMyAdmin work, we have to change logging in method to mysql_native_password.
|
1 2 3 4 |
sudo mysql -u root -p << EOF UPDATE mysql.user SET plugin = 'mysql_native_password' WHERE user = 'root' AND plugin = 'unix_socket'; FLUSH PRIVILEGES; EOF |
Now we can install phpMyAdmin without problems and then secure MariaDB installation. phpMyAdmin is a set of PHP scripts for easy MariaDB / MySQL database management. It allows you to create / delete databases, add / delete relationships, and edit their structure and contents. All operations can be performed from a web browser, in a graphical environment, without having to work with the default text interface. The phpMyAdmin installer will ask you to choose a web server that will be automatically configured to run phpMyAdmin and the password for phpmysql user. If we leave it blank, the installer will generate the password itself for the newly created phpmyadmin user.
|
1 2 |
sudo apt-get install phpmyadmin sudo mysql_secure_installation |
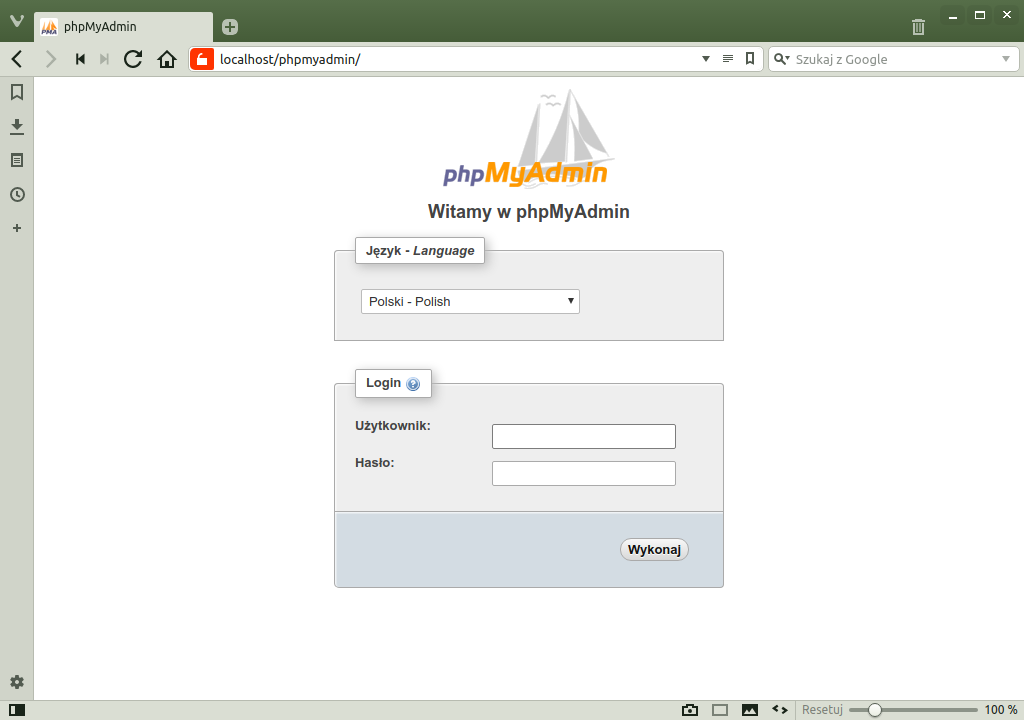
phpMyAdmin on LAMP
The second command will ask you a few questions on production servers I strongly encourage you to answer 'Yes’ to all questions:
|
1 2 3 4 5 6 7 8 9 10 11 12 13 14 15 16 17 18 19 20 21 22 23 24 25 26 27 28 29 30 31 32 33 34 35 36 37 38 39 40 41 42 43 44 45 46 47 48 49 50 51 52 53 54 55 56 57 58 59 |
NOTE: RUNNING ALL PARTS OF THIS SCRIPT IS RECOMMENDED FOR ALL MariaDB SERVERS IN PRODUCTION USE! PLEASE READ EACH STEP CAREFULLY! In order to log into MariaDB to secure it, we'll need the current password for the root user. If you've just installed MariaDB, and you haven't set the root password yet, the password will be blank, so you should just press enter here. Enter current password for root (enter for none): OK, successfully used password, moving on... Setting the root password ensures that nobody can log into the MariaDB root user without the proper authorization. Set root password? [Y/n] Y New password: Re-enter new password: Password updated successfully! Reloading privilege tables.. ... Success! By default, a MariaDB installation has an anonymous user, allowing anyone to log into MariaDB without having to have a user account created for them. This is intended only for testing, and to make the installation go a bit smoother. You should remove them before moving into a production environment. Remove anonymous users? [Y/n] Y ... Success! Normally, root should only be allowed to connect from 'localhost'. This ensures that someone cannot guess at the root password from the network. Disallow root login remotely? [Y/n] Y ... Success! By default, MariaDB comes with a database named 'test' that anyone can access. This is also intended only for testing, and should be removed before moving into a production environment. Remove test database and access to it? [Y/n] Y - Dropping test database... ... Success! - Removing privileges on test database... ... Success! Reloading the privilege tables will ensure that all changes made so far will take effect immediately. Reload privilege tables now? [Y/n] Y ... Success! Cleaning up... All done! If you've completed all of the above steps, your MariaDB installation should now be secure. Thanks for using MariaDB! |
This is enough to make LAMP work, but the field for configuration changes is large.