


Odin is a simple yet great tool that let you save your soft bricked Android device. But how to distinguish different states of bricked / broken Android device?
- Soft brick is the state of Android device which occur due to some software problems like boot loops or freezing at some point during boot. If you are able to at least get into download mode, you may still be able to recover your device.
- Hard brick is the state of android device that occurs when your device won’t boot at all. This occurs due to trying to install / modify ROM incorrectly. This is more difficult to resolve and often require professional help.
- Broken is a state of android device that occurs when any hardware component of device break down. This may occur due to electrical over charge, device dropped, water spilled etc. This require the electrical component being repaired or replace and does not occur due to any non supported software installation.
Install Samsung USB Drivers
First of all you need to download Samsung USB Drivers, extract it and install. Installing Samsung USB Drivers awfully easy. Just select Language and Country:

Samsung USB Drivers – Language and Country
and then Installation Location:

Samsung USB Drivers – Installation Location
(I just left the default values) and press Next / Install.
Unbrick / unroot Samsung Galaxy Tab 3 SM-T110 using Odin
Next download and extract Odin V3.09 and stock firmware for your Samsung Galaxy Tab 3. In my opinion version 3.09 of Samsung Odin is better than newest V3.12.3, which is some cases does not recognize connected Samsung device. Make sure your tablet is fully charged. Put your Samsung Galaxy Tab 3 7.0 in download mode. To do so, turn it off and then turn it on by pressing and holding Volume Down + Home + Power simultaneously. You will see a warning: A custom OS can cause critical problems in the phone and installed applications. If you want to download a custom OS, press the volume up key. Otherwise, press the volume down key to cancel. Press Volume Up to continue. Connect it to your computer. If you have never connected your tablet to your computer in download mode, the device manager will start installing the drivers. It may take a few minutes. Just be patient. Do not run Samsung Odin yet. And definitely DO NOT START flashing process until all necessary drivers are installed property! When you make sure that the device manager has finished its job, run Odin. As soon as Samsung Odin detects your phone, the ID:COM box will turn cyan and in the Message box you will see <ID:0/004> Added!! or similar message. Leave the default settings: Auto Reboot and F. Reset Time checked and all other options unchecked. Hit AP button and select the *_HOME.tar.md5 file from extracted stock firmware.

Odin3 flashing stock firmware – start
Finally, hit the Start button – the flashing process begins. You will see a progress bar both on the tablet and in Odin tool. After flashing is done, the tablet will restart:

Odin3 flashing stock firmware – reset
and should boot to the system fine:
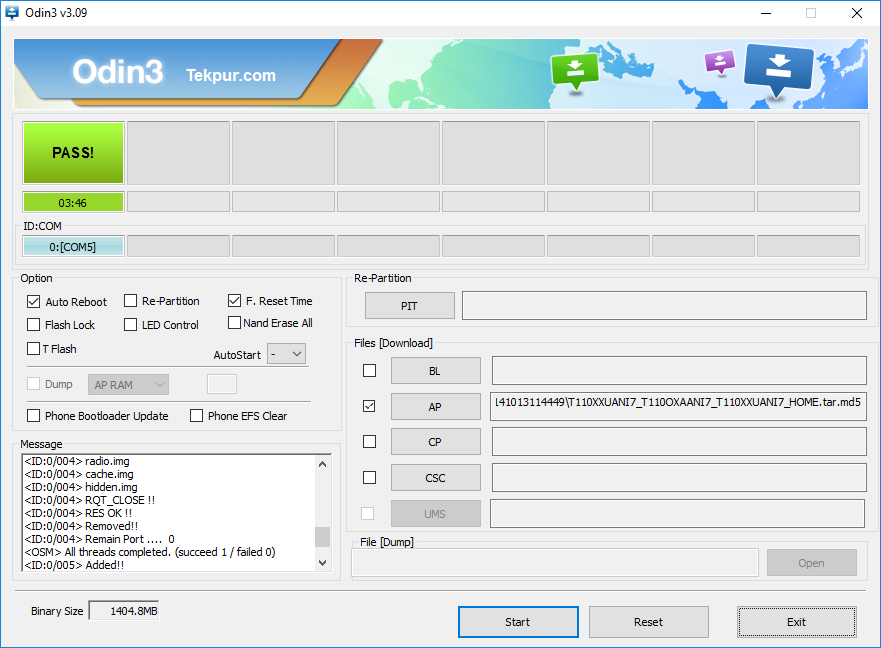
Odin3 flashing stock firmware – pass
Install TWRP custom recovery and root your Samsung Galaxy Tab 3 7.0
In addition you can install a custom recovery. Installing a custom recovery lets you root your Android tablet. There are 2 different custom recoveries for Samsung Galaxy Tab 3 7.0: TWRP and CWM. CWM did not work for me and honestly I don’t care about it, because I prefer TWRP anyway. So download and extract TWRP. Installing custom recovery is quite similar to installing stock firmware. The only difference is that on the Options tab, you should turn off Auto Reboot. Why? Because after installing TWRP we want to reboot tablet to the recovery mode instead of system.
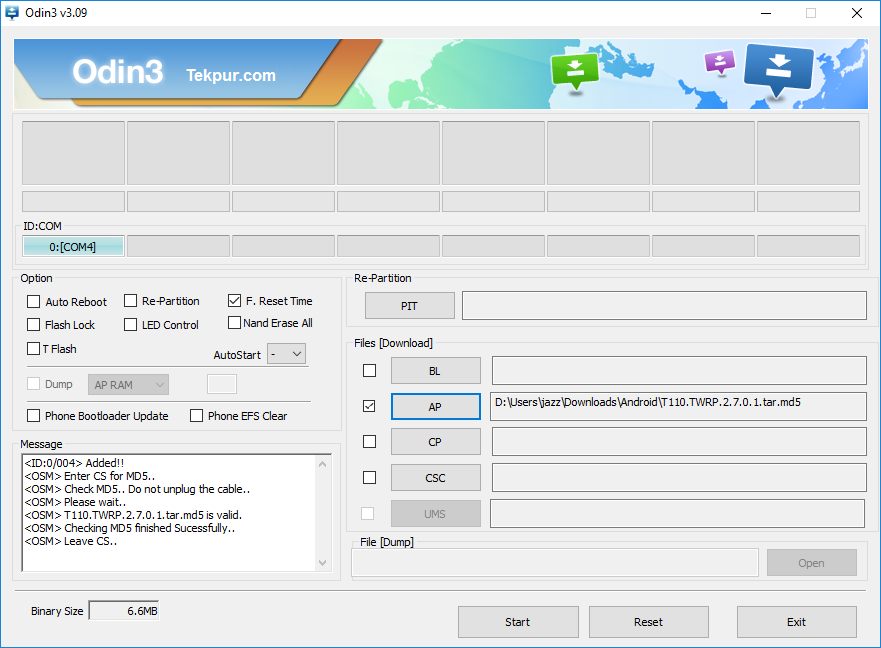
Odin3 flashing TWRP – start.png
Finally, hit the Start button. After a few seconds you will have TWRP installed.

Odin3 flashing TWRP – reset
Furthermore press and hold Volume Up + Home + Power simultaneously. Your table will reboot into recovery mode. From the TWRP just reboot to the system.
To root your Android device just press Reboot and then System. TWRP will ask you whether to install SuperSU. Swipe to install. After reboot a new application will appear in the app drawer SuperSU Installer
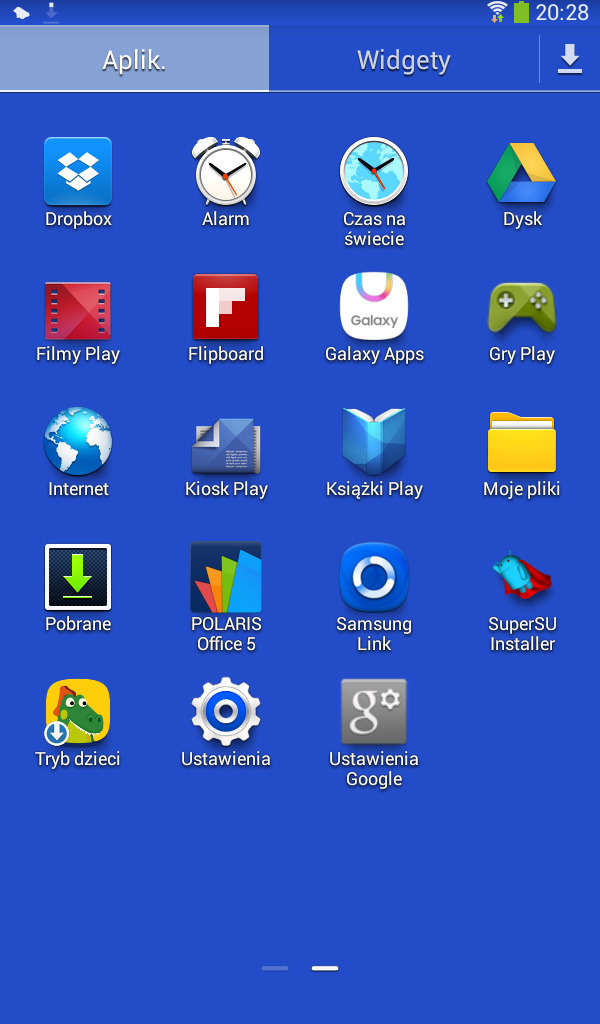
SuperSU Installer in the app drawer
Run SuperSU Installer and follow the instructions.
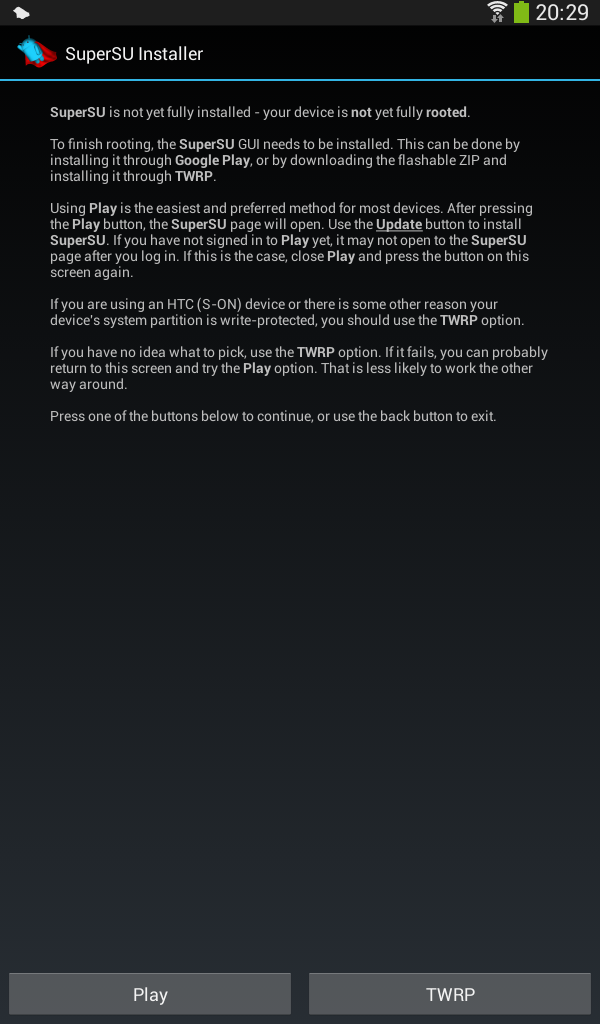
SuperSU Installer instructions
Choose Play then Update and finally Open SuperSU. If you are new to SuperSU choose New user.

Update SuperSU form Google Play Store
Finally update SU binary.
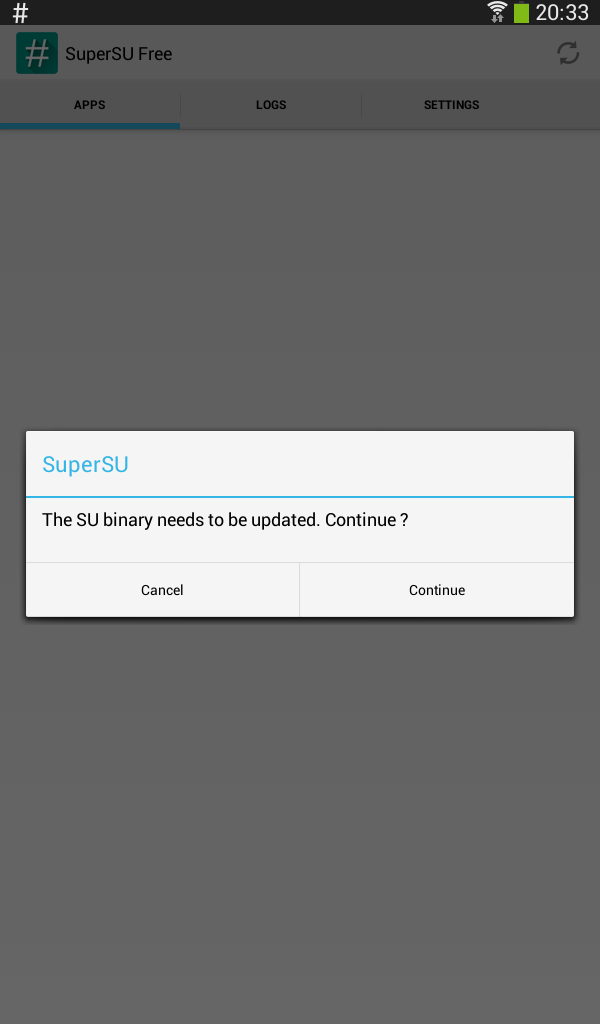
Update SU binary
Just hit Continue and next Normal.

Update SU binary – choose method
Now you can enjoy your rooted device.
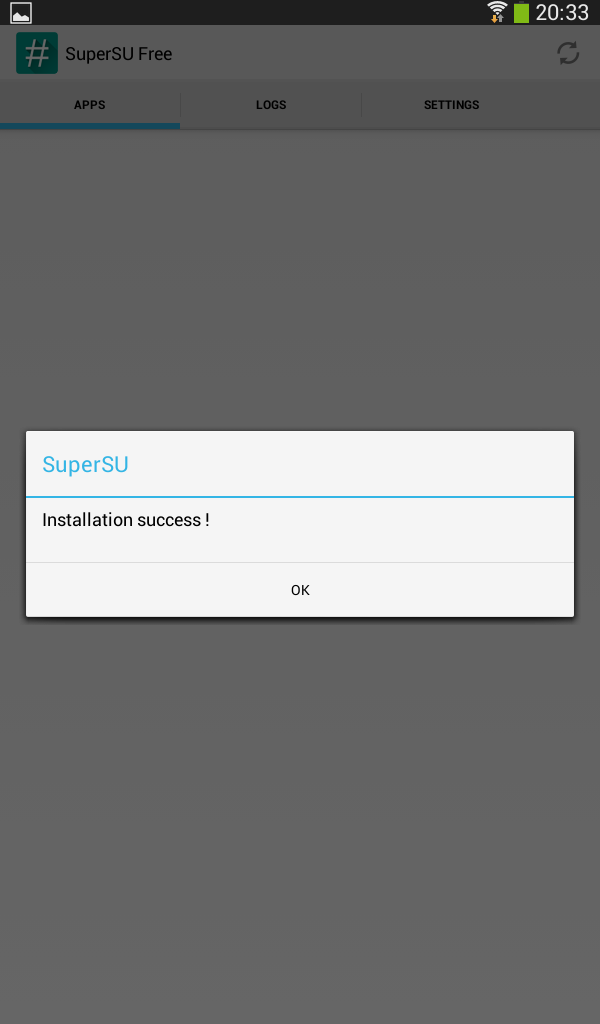
SuperSU – Installation success
Download
Samsung USB Drivers V1.5.27.0
Odin V3.09
Stock firmware for Samsung Galaxy Tab 3 Lite (SM-T110)
TWRP for Samsung Galaxy Tab 3 7.0